Description
Steps on Wearing Adhesive Bras
| Step | Action |
|---|---|
| Step 1 | Wash your hands and chest |
| Step 2 | Dry your hands and breasts |
| Step 3 | Remove the bra’s plastic protector |
| Step 4 | Place one cup at a time, a few inches above the breast’s bottom part |
| Step 5 | Connect the clasps if there are any |
| Step 6 | Press the side wings against the skin |
| Step 7 | Ensure there are no cup gaps |
| Step 8 | Readjust if necessary |
Step 1: Wash Your Hands and Chest
Before touching the bra, thoroughly wash your hands. You want to get all the dirt and oil off, so it doesn’t transfer to the bra. Similarly, you also want to clean off your chest. Since the goal is to have the bra stick to your breasts for a long period of time, cleanliness is key!
Step 2: Dry Off
Once clean, completely dry your hands and chest. The presence of moisture can weaken the tackiness of the adhesive. Be sure to not apply any cream, lotion, or oil once you have cleaned and dried your assets!
Tips
Follow the rest of these steps while in front of the mirror.
Step 3: Gently Peel off the Plastic Protectors
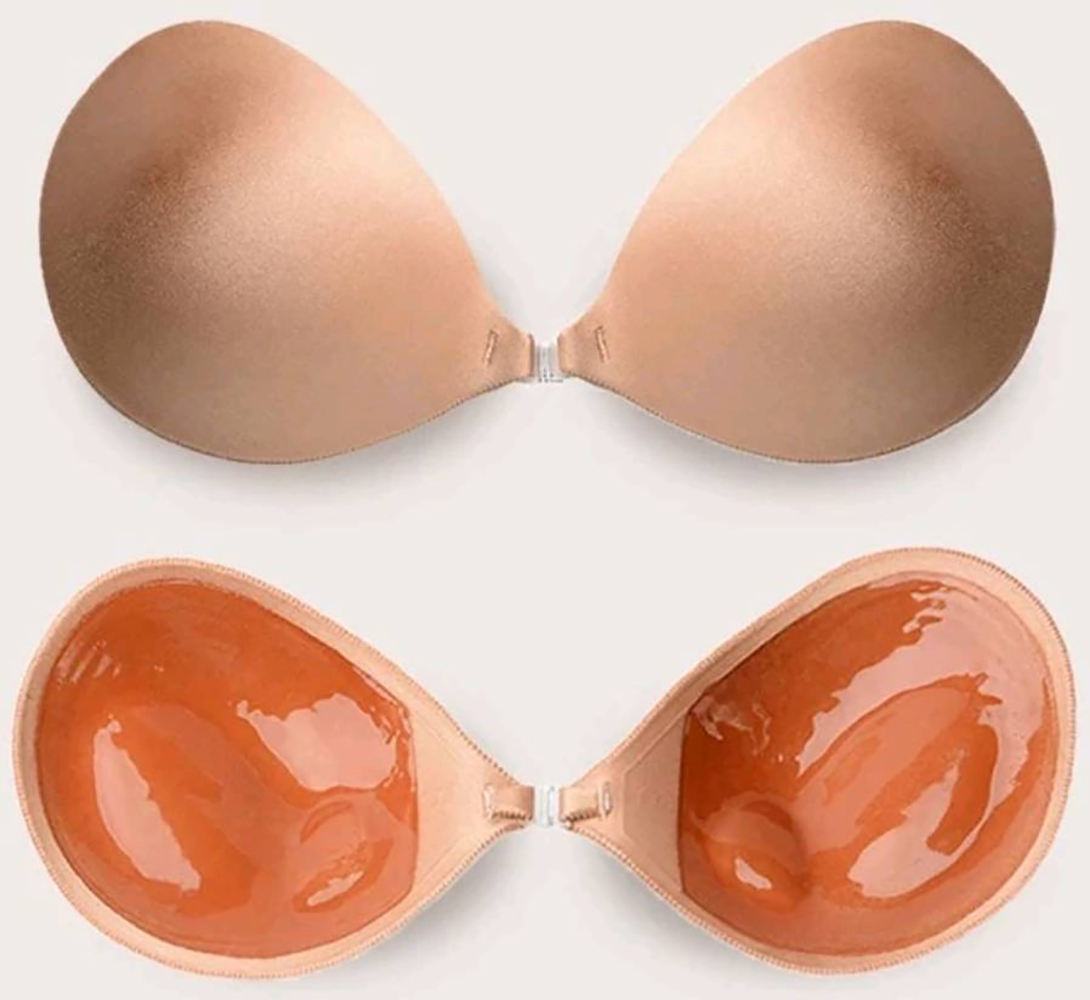
If it’s your first time trying to wear a stick-on bra, you’ll likely see a plastic protector which covers the adhesive side of the cup. Hold one end of the protector by the edge and gently peel off the protector.
Don’t throw it away! Place it aside, as you’ll need it again. Peel off both cup protectors.
Step 4: Apply One Cup at a Time
Depending on the style of your backless bra, the exact method you’ll want to stick it to your breasts may vary. The overall goal is to have the undergarment firmly pressed against your skin.
It should not be pulling your boobs down towards your stomach. Take one cup and hold it with the sticky part facing your boob. When positioning it, it does not need to sit below your boob like a normal bra typically would.
This can actually give the appearance of saggy boobs. Try placing it right above the bottom of your bosom. Lean forward, and gently apply the cup from the bottom. Apply it upwards until you get that lift you desire.
Some bras have soft inner padding for your nipples. If yours has one, ensure that your nips rest under the padding as you lift up the cup. Follow the same procedure when applying the second cup.
Tips
The positioning of the cups determines how much skin you’d like to have visible. Play around with the placement until you find something you’re comfortable with!
Step 5: Connect the Cups in the Front Closure
Depending on your stick-on bra, how the cups connect can vary:
Clasp Connector
This clasp is similar to what you might have on a front-connecting bra. Basically, you want to snap the two clasp halves together. This will securely keep the cups together. Aim for about 3 inches between the clasps if you desire a fuller cleavage.
Lace Connector
There should be a toggle in the middle of the cups that clasps the drawstrings together. This toggle assists in adjusting the cups for perfect cleavage.
From there, you can tighten or loosen the strings until you feel comfortable with the tightness of the bra. You can adjust the cups’ position by cinching the drawstrings until you get the silhouette you want.
Fabric Connector
Some bras are already attached together with fabric connecting the cups. In this case, the distance between them is not adjustable.
No Connector
Some sticky bras have no connector in the middle, and the cups stick to your body independently of one another. In this case, check to make sure you’ve applied the cups in the same spot on each boob. You don’t want one boob sitting higher than the other.
Step 6: Attach the Wings
This step will not apply to all backless bras, so if your contraption doesn’t have wings on the sides, skip down to the next step.
The wings are meant to provide some extra strength and support. If you’re bust is bigger, look for a winged option! Also, if you’re prone to sweating more, wings can help provide backup as your skin gets slippery.
Once the cups are securely in place, take one of the wings and press it against your skin. Start closest to your breast, working your way around your side and to part of your back.
Each wing is meant to wrap about a quarter around your back. You’ll still get that backless appearance near the center. Make sure the wing is free of air bubbles and creases, and then move to the next one.
Step 7: Ensure Your Adhesive Bra Sticks
The first time you wear this backless device, it’s common to constantly worry if it’s actually going to hold up. You may even find yourself subtly pressing your hands or arms against your chest to make sure they aren’t sliding everywhere!
To develop that sense of security, here are a few recommended tips for securely fitting your adhesive bra:
- Apply the cups symmetrically (at the same angles). If one cup is slightly lower, it tends to pull the other cup downwards. This may also make your girls appear saggy, something you don’t want to happen.
- Ensure there is no space left between the breasts and the padding. To do this, smoothen the bra over your breasts. Work all the way up from the bottom. Smoothening removes any air bubbles that would cause the bra to loosen. It also eliminates the wrinkles that may taint your sheer glam dress.
- These bras work best for A-D cup sizes. Anything above that can be a bit challenging to wear and comfortably stick throughout the night. If you are on the larger side, opt for one with wings for additional support.
Step 8: Readjust the Cups
You might not find the right angle during your first try. That’s okay! So, you may need to take off the cups and redo the process. There can be a slight learning curve when wearing these sticky pieces of fabric for the first time.
Gently peel off the cups from your girls starting from the top to the bottom. Then, adjust them until you find the best angle for your bust.
Note that attempting the process several times makes the adhesive start to wear away. After several unsuccessful tries, wash them up to get the adhesive effect back.
For D cups and above, you might want to consider taping your breasts for a little more durable way of keeping your girls up through the night


Reviews
There are no reviews yet.